
Essential Tips for Building a Durable Outdoor Deck
A deck takes more punishment than most parts of a home. It sits in full sun, catches rain, copes with foot traffic, and often has furniture, pots, pets, barbecues, and kids working it hard year after year.
A beautiful deck matters, but durability starts long before the boards go down. The best outdoor decks are planned as small structures, not just flat timber platforms. They need sound footings, drainage, airflow, the right fixings, and materials that suit the site.
Whether the goal is a compact landing, a family entertaining area, or a raised deck overlooking the garden, these tips will help you build something that looks good and lasts.
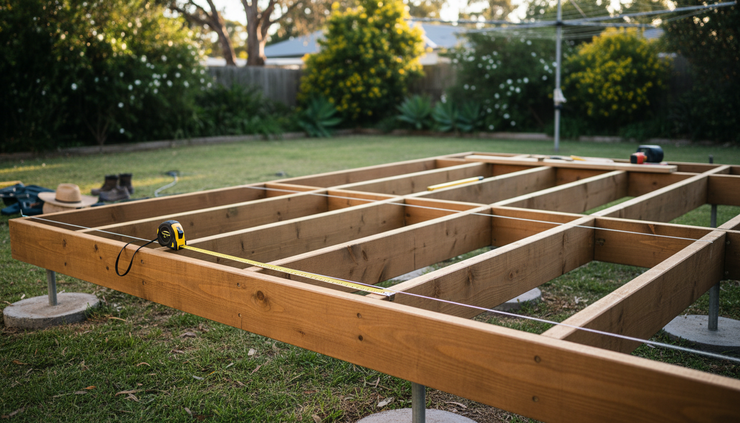
Start with the site, not the decking boards
The first mistake many deck builds make is starting with the finish. Timber species, board width, and stain colour matter, but the ground below matters more.
Walk the site after rain if possible. Look for pooling water, soft soil, downpipe discharge, shade, tree roots, and the direction of the afternoon sun. A dry, well-ventilated site is much kinder to a deck than a damp corner with poor airflow.
Think through these site details before drawing the frame:
Water movement
Decking should never trap water against the house or under the frame. Plan where rain will go, especially if the deck sits close to doors or existing paving.
Ground clearance
Low decks need extra care. Limited clearance restricts airflow and makes timber slower to dry. That raises the risk of cupping, mould, and decay.
Access
Leave room to inspect plumbing, clear leaves, and check fasteners. A deck that cannot be accessed is harder to maintain.
Sun and shade
Full sun can dry and fade boards faster. Heavy shade can keep them damp. Both conditions affect material choice.
Nearby vegetation
Leaves and soil build-up hold moisture. Keep garden beds and mulch below deck level and away from timber.
For decks attached to a house, pay close attention to the connection point. The ledger board, if used, must be fixed correctly and flashed well so water cannot sit behind it. Many deck failures start where timber meets the house, not in the middle of the deck.
A freestanding deck can avoid some waterproofing issues because it does not rely as heavily on the building wall. It still needs proper bracing and footings, but it may be a smarter choice for tricky sites.
Get approvals and structural details right
A deck is a structure. In Australia, requirements vary by council, state, height, size, bushfire setting, and whether the deck connects to the home. Some small low-level decks may not need formal approval, while raised decks, roofed decks, and decks near boundaries often do.
Before building, check:
Local council requirements
Relevant building rules and setback controls
Height limits and balustrade requirements
Bushfire Attack Level requirements if the property is in a bushfire-prone area
Termite management requirements
Easements, drainage lines, and services
Whether engineering is needed for raised or complex decks
For any deck that is elevated, carries heavy loads, or supports a roof, get a qualified builder, engineer, or building designer involved. Guessing bearer sizes or footing depths is not a saving if the frame moves later.
A clear plan should show:
Deck size and finished height
Footing positions
Post, bearer, and joist sizes
Joist spacing
Bracing
Stair details
Balustrade details
Fastener and connector type
Board direction and layout
A durable deck is designed to shed water, dry quickly, and carry loads safely. Good looks come after those three things.
Footings deserve special attention. They transfer the deck load into the ground, so they must suit the soil and the structure. Clay soil, sandy soil, sloping ground, and filled ground can all behave differently. Posts should not sit directly in damp soil unless the design and material are made for that exposure.
For timber posts, keep the correct treatment level in mind. Above-ground timber, in-ground timber, and coastal exposure are not the same environment. Use materials rated for the job, not just what looks close enough at the timber yard.
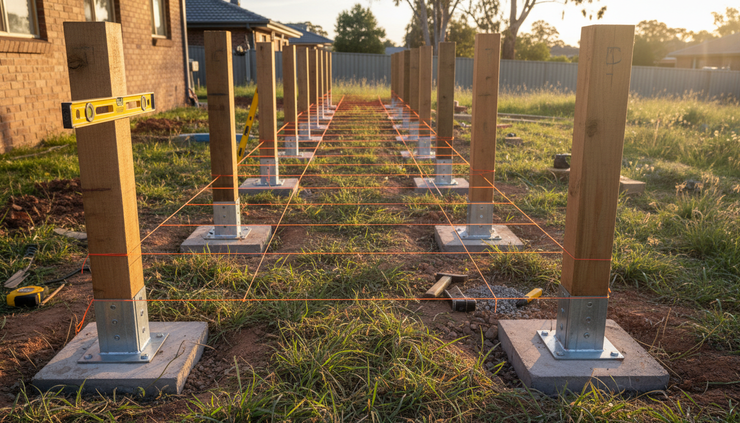
Choose materials that suit the climate and maintenance level
Decking materials are not just about appearance. The best choice depends on exposure, budget, maintenance habits, termite risk, and the look wanted.
Here is a simple comparison.
Material | Strengths | Watch-outs |
Treated pine | Cost-effective, easy to work with, widely available | Needs the right treatment rating and regular coating |
Australian hardwood | Strong, attractive, long-lasting when well maintained | Can be harder to cut and fix, may move if not seasoned properly |
Composite decking | Lower maintenance, consistent appearance, no oiling needed | Can get hot in full sun and still needs correct installation |
Aluminium or steel framing | Stable, termite resistant, suitable for some low-clearance sites | Needs compatible fixings and accurate installation |
For timber decking, check that boards are suitable for external use and that the treatment class matches the application. H3 treated timber is commonly used above ground, while H4 is used for some in-ground applications. Always follow supplier guidance and local requirements.
Hardwoods such as spotted gum, blackbutt, and merbau are common choices for Australian decks. They can perform well, but they still need correct spacing, sealing, and care. Dense timber can split if it is fixed without pre-drilling, especially near board ends.
Composite decking can be a good option for busy households that want less regular coating. It still expands and contracts, and it still needs airflow. Follow the manufacturer’s fixing system, joist spacing, and gap requirements exactly.
The frame is just as important as the surface. A beautiful hardwood deck over a poorly drained, undersized frame will not stay trouble-free. Spend money where it matters most: footings, frame, connectors, flashing, and ventilation.
Use the right fixings for the environment
Fixings are small, but they decide how well the deck holds together. Outdoor decks need corrosion-resistant screws, nails, brackets, and bolts. In coastal areas, stainless steel is often the safer choice. In many general outdoor settings, hot-dipped galvanised fixings may be suitable, depending on the materials used.
Do not mix metals casually. Some metal combinations corrode faster when exposed to moisture. Treated timbers can also react with unsuitable fasteners. Check compatibility between timber treatment, brackets, screws, and any metal framing.
For decking boards, screws usually give better long-term holding power than nails. Hidden fixing systems can look clean, but they need accurate installation and compatible boards. Face screws are visible, but they make later board replacement easier.
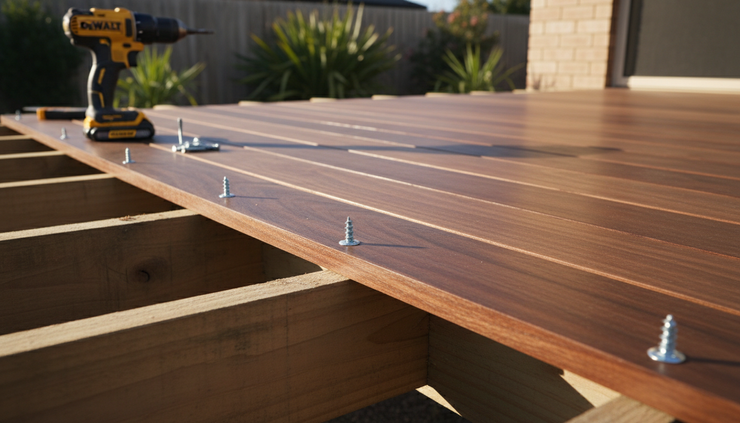
Build for drainage, airflow, and movement
A deck lasts longer when it dries quickly. That simple rule should guide almost every construction detail.
Leave gaps between decking boards so water and debris can pass through. The exact gap depends on the board material, moisture content, and manufacturer guidance. Timber can shrink or swell after installation, so the right spacing at the start matters.
Avoid building a frame that traps water. Joists, bearers, and ledgers should be detailed so moisture does not sit on horizontal surfaces longer than necessary. Some builders use joist protection tape to reduce water sitting on the top of joists, especially where decking boards are screwed down.
Airflow under the deck is essential. If the deck is very low to the ground, consider whether timber is the right choice. Low decks can work, but they need careful detailing, ground preparation, and moisture control. Removing organic material, using drainage gravel where suitable, and keeping soil clear of timber can all help.
Board direction also affects drainage and appearance. Boards running away from the house can help lead the eye into the garden. Boards running parallel to the house may suit some layouts better, but make sure water does not get trapped against walls or thresholds.
Plan stairs and balustrades early
Stairs and balustrades are often treated as later details. They should be part of the first plan.
Stairs need safe proportions, secure stringers, non-slip treads, and a stable landing. If the deck height requires a balustrade, it must meet relevant height and opening rules. This is not an area for guesswork, especially on raised decks.
Think about how people will use the space:
Where will they carry food from the kitchen?
Will furniture block the main path?
Does the barbecue need heat clearance?
Are there steps where someone might not expect them?
Will lighting be needed at night?
A deck can be structurally sound and still feel awkward if movement through the space has not been planned.
Protect the deck before and after installation
Durability does not stop when construction finishes. Timber needs protection from moisture and sun, and that protection starts before the boards are installed.
Seal cut ends as soon as possible, especially on treated pine and hardwood boards. Cut ends absorb moisture quickly and can become weak points. Use an end-grain sealer or preservative recommended for the timber type.
Coat all accessible sides where recommended. Some decking products come pre-oiled or pre-primed, but many benefit from coating before or soon after installation. Follow the supplier’s timing advice, especially for freshly milled or high-tannin timber.
Tannins can leach from some hardwoods, particularly after rain. This can stain pale paving, rendered walls, or pool surrounds. Washing and weathering can reduce the issue, but planning helps. Avoid placing stain-sensitive surfaces below new hardwood if runoff is likely.
A practical maintenance routine is simple:
Sweep leaves and debris often
Hose off dirt before it builds up
Clear gaps between boards
Keep pot plants on stands or trays
Move furniture occasionally so boards weather evenly
Recoat timber when water stops beading or the finish looks dry
Check loose screws, raised nails, and board movement
Composite decks need less coating work, but they still need cleaning. Dirt, food spills, and leaf litter can mark the surface if left in place. Use cleaning products recommended by the manufacturer.
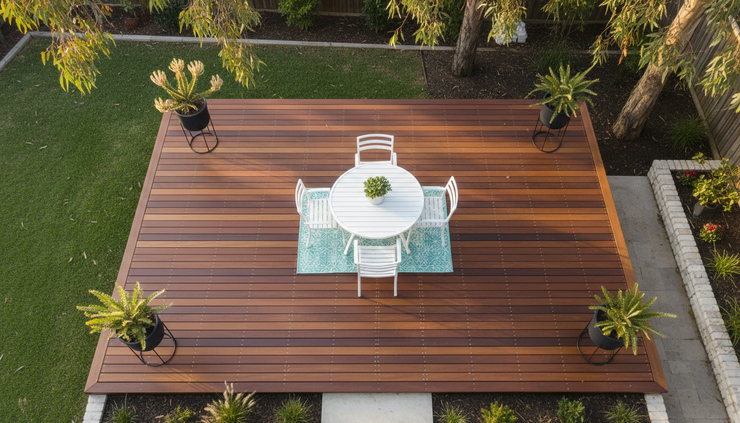
Avoid shortcuts that shorten the deck’s life
Some deck problems show up quickly. Others take two or three wet seasons to reveal themselves. Most come from shortcuts that seemed harmless during the build.
Watch for these common issues:
No gap between boards
Tight boards trap water and dirt. They can swell, cup, and become slippery.
Poor ledger flashing
Water behind a ledger can damage both the deck and the house structure.
Undersized joists or bearers
A springy deck may feel unsafe and can worsen as fixings loosen.
Wrong fasteners
Indoor screws, light-duty brackets, or incompatible metals can corrode and fail outdoors.
Timber too close to soil
Soil holds moisture and can invite termites and decay.
No allowance for expansion
Timber and composite boards both move. Fixed too tightly, they can buckle or pull at fixings.
Skipping pre-drilling
Dense hardwood can split, especially near ends. Pre-drilling gives a cleaner, stronger result.
Ignoring ventilation
A damp underside can undo good surface maintenance.
The safest approach is to treat every hidden detail as if it will matter later, because it will. The parts you cannot see once the boards are down are often the parts that decide how long the deck lasts.
Finish with comfort, safety, and everyday use in mind
A durable deck should also be pleasant to live with. Think about heat, glare, privacy, lighting, and furniture before the final board goes down.
Dark boards can look striking, but they may get hot in direct summer sun. Pale boards can feel cooler, but they may show dirt more easily. Textured or grooved surfaces can improve grip in some settings, yet they may hold debris if installed in the wrong direction or not cleaned often.
If the deck will be used at night, plan lighting early. Step lights, low garden lights, or warm wall lights can make the space safer without flooding the yard. Run any cabling safely and legally, using licensed trades where required.
For covered areas, make sure posts, roof connections, and drainage are designed as a system. Adding a roof later can change loads on the deck, so it should not be treated as a simple cosmetic upgrade.
The best deck is the one that suits the site, handles the weather, and is easy to care for. Start with the ground, build a strong frame, choose suitable materials, and protect every cut, fixing, and joint. Do that, and the finished space will be more than a good-looking outdoor room. It will be a dependable part of the home for years.
Comments