
Building a Retaining Wall Tips and Tricks for a Strong Lasting Structure
A retaining wall looks simple from the front. A neat row of timber, blocks, stone, or concrete can make a sloped yard feel ordered and usable. The real work, though, happens behind and below the wall.
A strong retaining wall depends on three things: a sound base, good drainage, and the right support for the soil it is holding back. Miss any one of those and the wall may lean, bulge, rot early, or fail after heavy rain.
This guide covers practical tips and tricks for planning and building a long-lasting retaining wall, with a focus on the details that matter most on Australian sites.
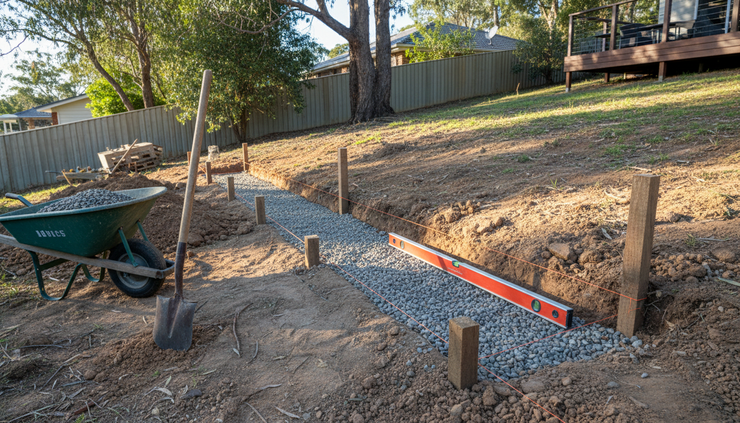
Start with the site before you start digging
The best retaining walls are planned from the ground up. Before choosing materials or ordering supplies, spend time reading the site.
Look at where the water flows after rain. Check whether the wall will sit near a fence, driveway, pool, shed, easement, or neighbouring boundary. Soil behaves differently under load, and a small garden wall is not the same job as a wall holding back a driveway or steep bank.
For many Australian councils, retaining walls over a certain height, close to boundaries, or carrying extra loads may need approval or engineering. The exact rules vary by state, council, wall type, and location. If the wall is more than a low garden edging, check before you build.
A practical site check should include:
The height of soil to be retained
The slope above and below the wall
The type of soil, such as clay, sand, gravel, or fill
Drainage paths during heavy rain
Nearby structures, fences, trees, and services
Access for digging, moving materials, and compacting the base
Clay soils need special care because they hold water and expand when wet. Sandy soils drain faster but can shift if not contained properly. Filled ground can be unpredictable, especially if it has not been compacted in layers.
A retaining wall does not only hold back soil. It also has to deal with water, movement, and pressure that change with the weather.
Mark the wall line with stakes and string. Use a string line to check the run, height, and corners. This simple step helps avoid a wall that wanders, dips, or finishes at the wrong level.
If the wall has curves, lay out the curve with a hose or flexible marking paint first. Stand back and check it from different angles. Curves can look great in a garden, but tight curves may make some materials harder to install neatly.
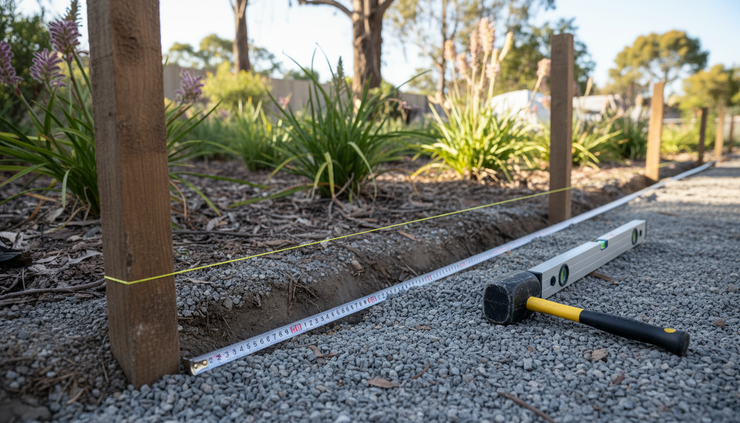
Choose materials that suit the wall and the site
There is no single best material for every retaining wall. The right choice depends on the wall height, budget, appearance, soil conditions, and how long the structure needs to last.
Common options include timber sleepers, concrete sleepers, segmental retaining wall blocks, stone, brick, and poured concrete. Each has strengths and limits.
Material | Best suited to | Main watch-out |
Timber sleepers | Garden walls and natural-looking landscaping | Needs correct treatment, drainage, and protection from constant moisture |
Concrete sleepers | Stronger walls with a clean modern look | Heavy to handle and often needs steel posts |
Segmental blocks | Curved or stepped landscape walls | Must follow manufacturer base and drainage details |
Stone | Feature walls and natural gardens | Needs skill to build safely and drain well |
Poured concrete | Engineered structural walls | Usually needs formwork, steel, and professional design |
Timber is popular because it is easy to work with and suits many gardens. If using treated pine sleepers, choose the correct hazard treatment level for ground contact and retaining wall use. Not all treated timber is suitable for every situation.
Concrete sleepers and steel posts are common where more strength is needed. Systems using galvanised retaining wall steel can perform well when installed with the right footing depth, post spacing, drainage, and backfill.
No matter which material is chosen, avoid designing the wall around looks alone. The wall face is only one part of the structure. The post holes, base, drainage layer, and backfill determine whether it holds its shape over time.
Match post spacing and footing depth to the wall
For sleeper walls, post spacing is critical. If posts are too far apart, sleepers can bow under pressure. If footings are too shallow, posts can lean.
Manufacturers often provide span and footing guidance for their systems. Follow those details. If there is no clear guidance, treat that as a warning sign, especially for anything above a low garden wall.
As a general rule, taller walls need:
Stronger posts
Deeper footings
Closer spacing
Better drainage
More careful compaction
Engineering advice when loads increase
Do not guess when a wall supports a driveway, building, steep slope, or boundary fence. Those loads can add serious pressure.
Build a base that will not settle
A retaining wall is only as straight as the base beneath it. If the base settles unevenly, the wall will show it. You may see gaps open, blocks tilt, sleepers dip, or posts move out of line.
Excavate to firm ground. Remove soft soil, roots, loose fill, and organic matter. A wall built on soft material will keep moving as that material breaks down or compresses.
For block walls, a compacted road base or crushed rock footing is usually used, with the first course set level and partly buried. For sleeper walls, posts are set in concrete footings, and the bottom sleeper usually sits close to ground level or slightly embedded depending on the design.
Good base preparation means:
Digging wide enough to work comfortably
Removing soft or wet material
Compacting the trench base
Adding road base or drainage gravel where required
Checking level along the full wall, not just at one end
Burying the first course enough to lock it in place
A small error at the first course becomes a bigger problem as the wall rises. Take extra time here. It is much easier to fix the base than to correct a leaning wall later.
Compact in thin layers
Backfill and base material should be compacted in layers, not dumped all at once. Thick, loose backfill settles after rain and creates uneven pressure.
Use a hand tamper for small tight spaces and a plate compactor where access allows. Keep heavy compaction equipment away from the wall face unless the wall system allows it. Too much pressure too close to a new wall can push it out of alignment.
For DIY garden walls, patience matters. Add material, spread it evenly, compact it, then repeat. This method takes longer, but it reduces future movement.
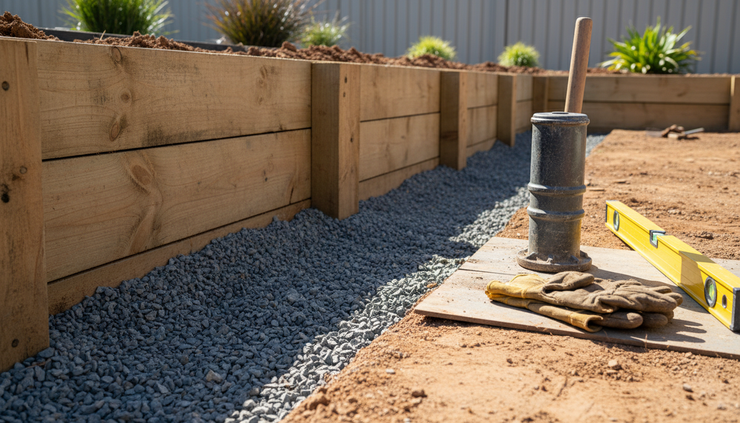
Treat drainage as part of the structure
Water is one of the main reasons retaining walls fail. Soil becomes much heavier when saturated. Water trapped behind a wall adds pressure, weakens the base, and speeds up timber decay.
That is why drainage is not an optional extra. It is part of the structure.
Most retaining walls need a drainage zone behind the wall. This often includes clean drainage gravel, a slotted ag pipe, geotextile fabric, and a clear outlet point. The aim is simple: collect water and move it away before it builds pressure.
A typical drainage setup includes:
Free-draining gravel behind the wall
Slotted agricultural pipe at the base
Fall on the pipe so water can escape
Geotextile fabric to reduce soil washing into the gravel
Drainage outlets that remain open and clear
The pipe should drain to a suitable point, not into a place where it causes problems for neighbours, paths, foundations, or lower parts of the garden. Local stormwater rules may apply, so plan the outlet properly.
Avoid soil directly against the wall
Packing clay or garden soil straight against the back of the wall is a common mistake. It traps moisture and increases pressure.
Place drainage gravel directly behind the wall, then use geotextile fabric to separate the gravel from the native soil. This helps keep fine soil particles from clogging the drainage layer.
For timber walls, keeping moisture away is even more important. Good drainage can extend the life of the wall because the timber spends less time sitting in wet soil.
Give surface water somewhere to go
Drainage behind the wall helps, but surface water still needs control. If rainwater from a lawn, path, roof, or driveway runs straight towards the wall, the drainage system has to work harder.
Shape the ground above the wall so water moves away where possible. Use spoon drains, swales, garden beds, or surface falls to guide water to a better location.
A wall that stays dry will last longer than a wall that becomes a dam every time it rains.
Keep the wall straight, tied, and supported
The visible finish matters, but structure comes first. A neat wall that is poorly tied or unsupported will not stay neat for long.
Use a level often. Check each post, sleeper, or block as the work rises. Also check the wall from the side to make sure it has not started to lean.
Some walls are built with a slight lean back into the soil, known as a batter. Segmental block systems often rely on this. Follow the system instructions because the correct batter varies.
For taller walls, stepped sites, or walls with heavy loads, extra reinforcement may be needed. This can include geogrid, tie-backs, deadmen, larger footings, or engineered post systems. These parts work by connecting the wall to a larger mass of stable soil behind it.
Never remove a support detail because it seems hidden or inconvenient. The parts you cannot see often do the most work.
Stagger joins where possible
For timber or block walls, avoid lining up vertical joins in a way that creates weak points. Staggering joins helps distribute load and produces a cleaner finish.
For sleeper walls between posts, make sure each sleeper seats properly and bears evenly. Do not rely on packing pieces to fix major gaps or poor levels. Packing can compress, rot, or fall out.
Step with the slope instead of fighting it
On sloping ground, stepped walls often work better than trying to force one long level wall across changing ground. Steps can reduce excavation, improve the look, and help keep wall heights manageable.
If several terraces are used, allow enough distance between walls. Walls built too close together can load each other. When in doubt, get advice before building a series of walls on a steep slope.
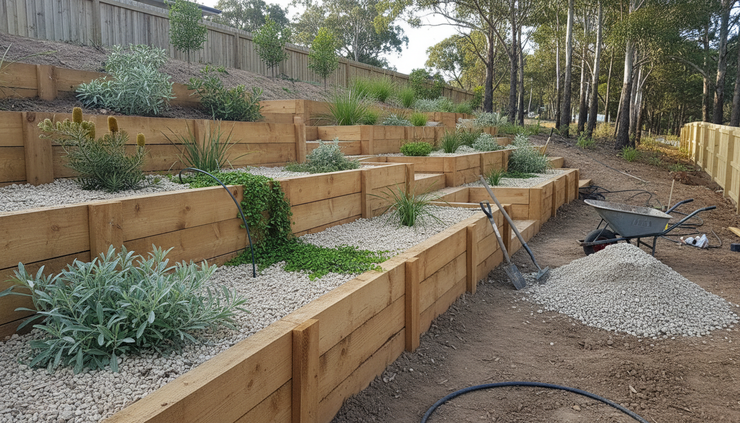
Finish the wall so it lasts
The finishing details help protect the work already done. Once the structure is built, trim the site neatly, cap the wall if needed, and keep soil levels under control.
Avoid burying the top of timber sleepers under mulch or wet soil. Keep mulch slightly back from the wall face and allow air movement where possible. If using caps, fix them securely and allow for water to shed rather than sit.
Planting can soften the look of a retaining wall, but choose plants carefully. Large trees or aggressive roots too close to the wall can create future problems. Smaller shrubs, grasses, and groundcovers are often safer choices.
After heavy rain, inspect the wall. Look for blocked outlets, soft spots, bulging, leaning, or water pooling behind the wall. Early fixes are much cheaper than rebuilding.
Good maintenance habits include:
Clearing leaves and silt from drain outlets
Checking for movement after storms
Keeping heavy loads away from the top edge
Replacing damaged sleepers or caps early
Watching for erosion at the base
Keeping irrigation from soaking the back of the wall
The strongest retaining walls do not rely on one clever trick. They come from getting the basics right in the right order.
Plan the site, build on a firm base, drain the water, use suitable materials, and follow support details carefully. Do that, and the wall has a much better chance of staying straight, safe, and useful for years.
Comments